Item List is a Sub-function of Manage Items. Here you can monitor your current listed SKU’s, create new Items and send inventory to a newegg warehouse. Below you’ll find guides on how to navigate and use Item List. Once you have created items you can view your catalog under Item List. Here you’ll be able to view total inventory amounts for each item you’ve created and make adjustments if needed.
Navigating to Item List
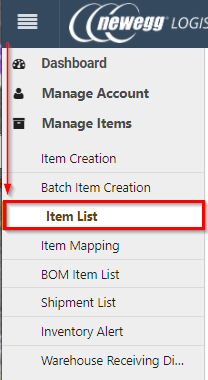
You can find the Item List sub function under the Manage Items main function.

Searching your Items
To search for your items, follow the steps below.
- Choose your search criteria. You have the available “basic” criteria to use.
Seller Part# – Clients part number
Mfr Part# – Part Number for sourced or Clients Part #
Ne Item# – Newegg’s product identifier number
Item Title – Clients item title
UPC / ISBN – Universal Product Code - Type in your search criteria into the field and click Search.

- Navigate your results. You can filter the results using the columns if needed.

If needed you can also use Advanced Options located by the search button to filter further. Below is a description of each option available.
Manufacturer – Allows you to view inventory based on product manufacture
Item Condition – Allows you to filter between item conditions in your inventory.

Inventory – This option lets you choose Inventory availability criteria for your search

Status – Allows you to choose between Active and Disabled Items
 .
.
Create Date – Allows you to specify items to view based on their creation date. This can be a specific date or set within a range.

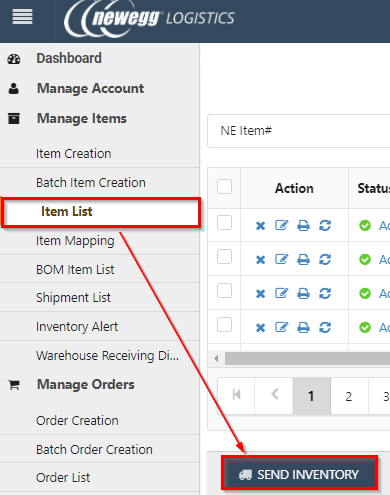
How to Send Inventory
Send Inventory can be used to send your items to a Newegg Warehouse. To do this, Follow the following steps.
- Navigate to and click Item List
- Navigate to the lower portion of the browser and click Send Inventory.
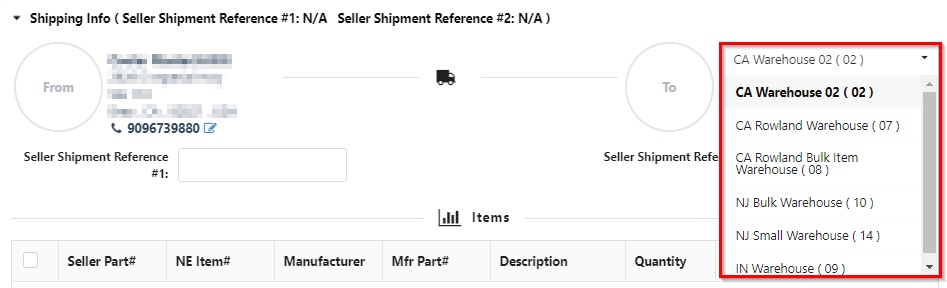
- Once you’re in the start screen, start with selecting the warehouse you’ll be sending the inventory to.
- Type in a Reference number needed for and navigate to Add item(s)
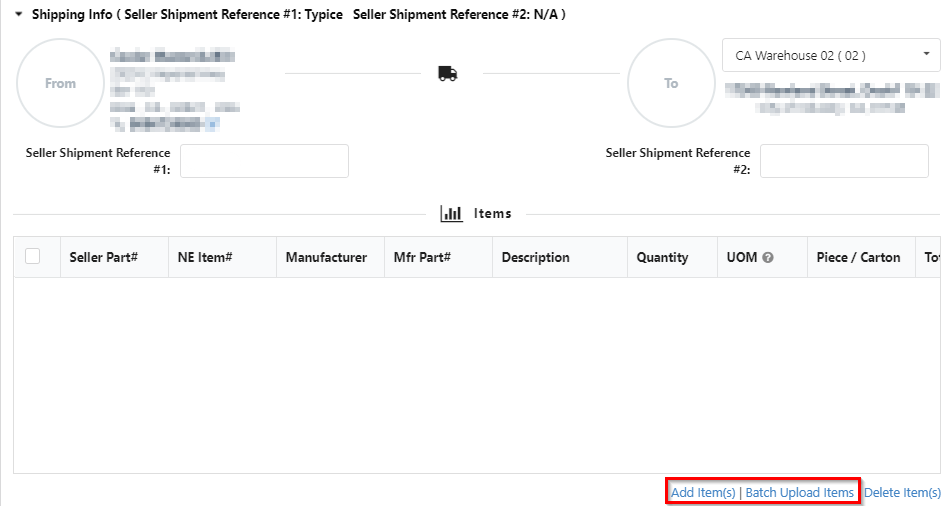
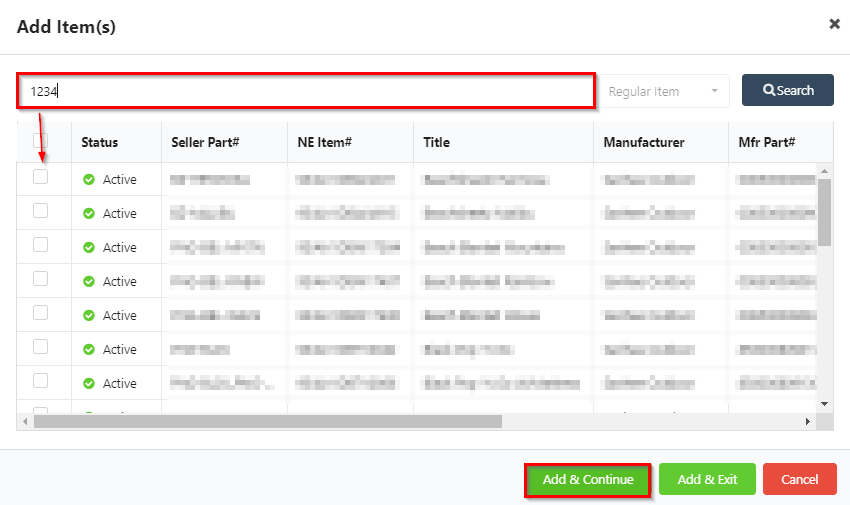
- Add items to the shipment by searching for your part numbers, checking the box, and then clicking Add & Continue
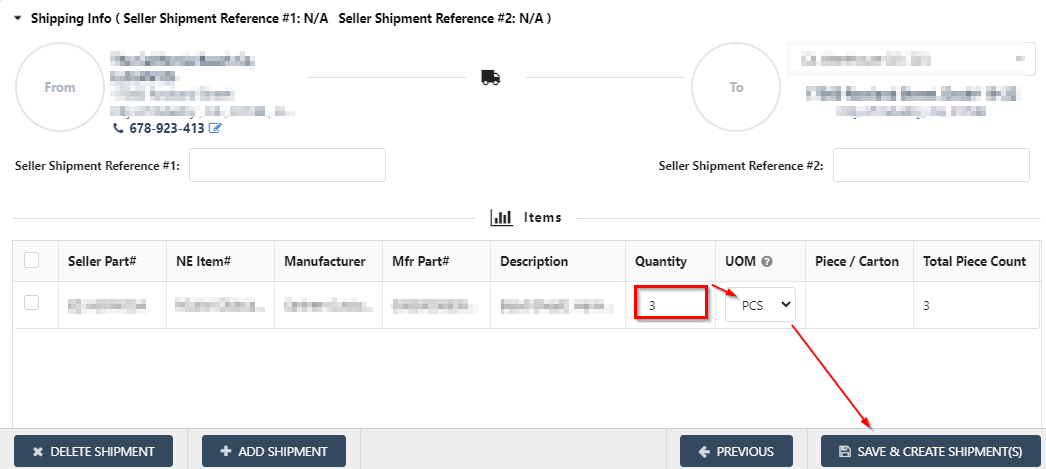
6. Enter the QTY and choose your unit of measurement. Once you have confirmed what you’re sending. Click Save & Create Shipment(s)


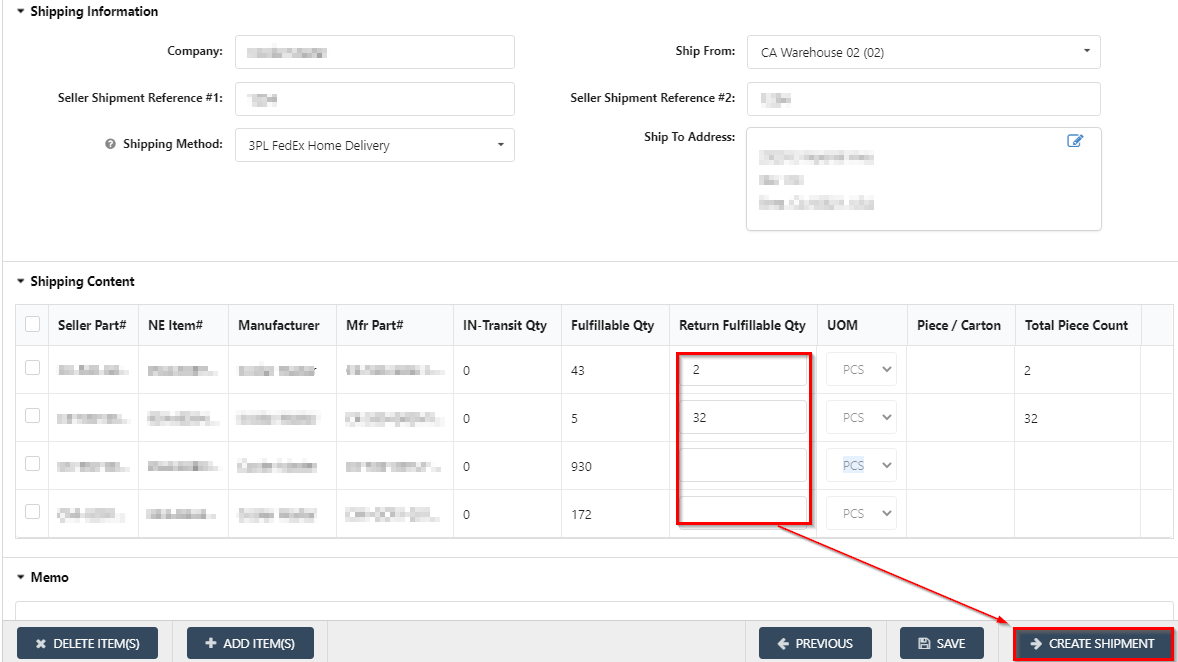
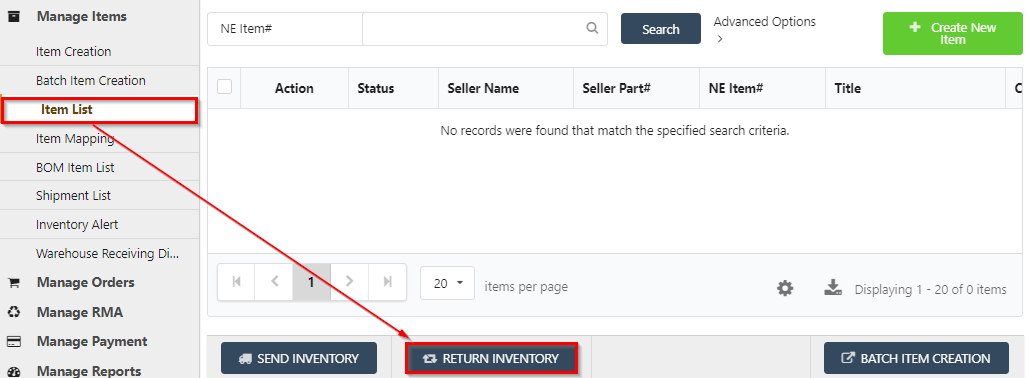
How to Return Inventory
Return Inventory shipments can be made for clients looking to send back items. This can be useful if you’re no longer selling a item or if your needing items back in your HQ.
- Navigate to Manage Items and click Item List
- Navigate to the lower portion of the browser and click Return Inventory
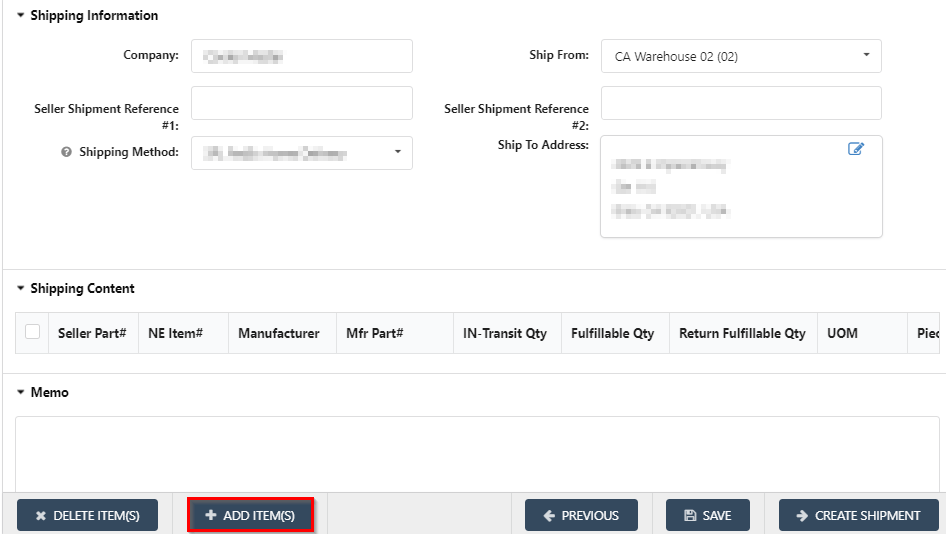
- Enter your shipment reference and select the warehouse to return items from.

4. Select your Ship To Address. This will default to your Primary Inventory Shipment Address. If you do not have a warehouse or office address for return, you can insert our warehouse address.
If need you can click the pencil mark and select other return addresses if you have multiple warehouses.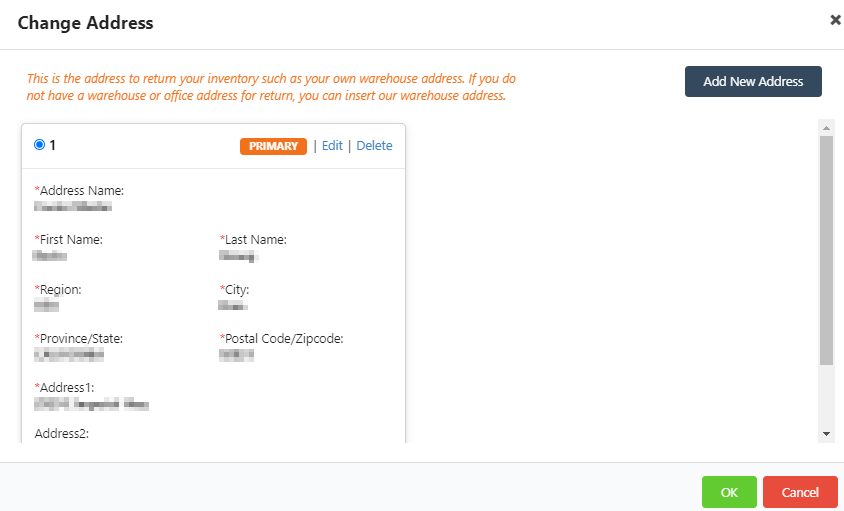
- Click Add Item(s) to add the items you’ll be returning from the selected newegg warehouse.
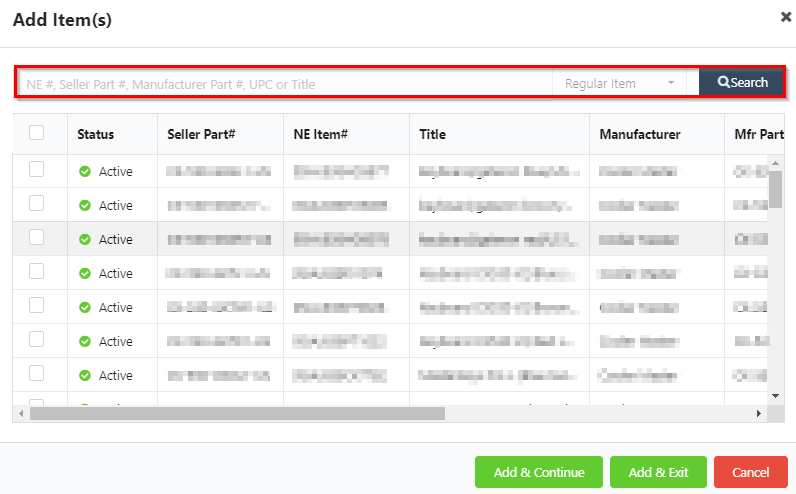
- Use the Search Box to your select part numbers. Check the box and click Add & Continue to keep searching for other parts or Add & Exit to return to the Return Inventory screen.
- Enter the Return Fulfillable Qty. Once you have entered your required information. Click Create Shipment to submit your Inventory Return.